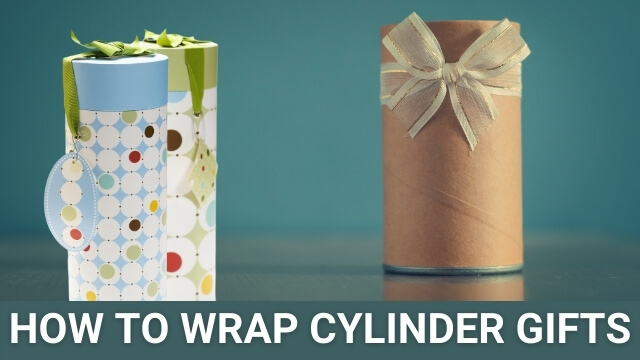
So this guide will show you How to Wrap Cylinder Gifts because not all gifts will come with rectangular or square boxes. In such a case, you actually may need to wrap the gift in a strange shape, such as a cylinder.
Wrapping a cylindrical gift is difficult, but not impossible. You can use several different methods to squeeze the gift into a cylindrical shape. Wrap it in paper, fan, or curl the edges to make the gift still look like it has been wrapped professionally.
Table of Contents
What would be the best way to pack a cylinder?
There are several ways to wrap a gift in a cylindrical shape. You can wrap it in foil and fan or twist the ends to make the gift look genuine. Or you can just place these gifts and put your gifts in a gift bag, which actually simplifies the packaging.
How do you wrap a candle in wrapping paper?
Wrapping a candle can be quite challenging because of its shape and size. Well, the best way to cover the candle is with tissue paper to protect it. Next, you can use the regular wrapping paper or just put the candle in the bag. If necessary, you can add a decorative fabric on top, then add labels or ribbons if required.
How do you wrap gifts in a hexagon?
To wrap the present in a hexagon could slightly challenging. But the easiest way is to get yourself a hexagonal box to wrap your gift in. Otherwise, you can start with a rectangular wrapping paper. And then wrap it in the box and seal it with tape. Leave 3 to 4 inches of extra paper at the top and bottom of the box. And finally, fold the paper into a small triangle on one of the edges of the box.
How much can I be charged to wrap a cylindrical present?
Professional packing usually charges a decent amount of money and can definitely do well. Although wrapping your own gifts is also cool, professionals can make the box look like a work of art. They are paid for their excellent skills. Typical prices for wrapping gifts ranges from $9 to $20, depending on how many items are available and which items are needed.
However, if you decide to wrap your own cylinder present, this is how to do it.
How to Wrap Cylinder Gifts In 2023
Preparation
All you need is wrapping paper, sharp scissors, a label, a pen, double-sided adhesive tape, and bows. Moreover, you can measure the card in advance.

- Tape Measure
- pencil
- Brown paper or tissue paper
- Scissors
- Invisible tape
- glue
- Loop (optional)
- Ribbon (optional)
There should be enough space around the cylinder with a small overlap of about 3 cm or 1 inch, and the sides should be just above the center mark. However, if the cut is insufficient, you can turn the paper 0.5 cm / 1/3 inch, then remove the double-sided tape and go down the edge.
A step-by-step guide to wrapping cylinder gifts
First Step
Measure the diameter (D) and calculate the circumference of the cylinder (3.14 x D). Add 2 inches to the circle and write the number. Please measure the length of the cylinder and add it to the size of the diameter. Then Record this metric.
Then Fold off the short end and then insert the double-sided tape. Wrap the paper around the rounded edges and tape.
Second Step
Wrap the paper around the rollers. After you cut the piece, place the gift in the paper’s center with the front of the wrapping paper facing down. Make a small 1/4 inch fold in one of the long edges of the paper. Moreover, place a strip of double-sided tape along the fold. Then wrap the piece in a roll and tape it off.
Please fold the paper, then use these two sizes as the brown paper’s length and width to mark the paper and cut it to the required size. Also, Fold one of the shortest edges of the wrapping paper for about 0.5 inches.
Third Step
Place the roll horizontally and center the paper with the top and bottom of the roll facing the paper’s long side. Then wrap the other end of the brown paper around the cylinder towards the folded end.
You can use your finger actually to hold the fold. It ends here. Sew a stitch on the wrapping paper and fold it in the middle. Grab the piece with a finger and the paper’s edge with your other hand and pull it inward. This will fold the paper like a folding fan. As you move along the cylinder, you can make folds with your fingers. Continue this process to the end.
Fourth Step
After making the fan folds on both ends of the gift, you can remove the gift by cutting off the excess paper and gluing both ends with double-sided tape. Alternatively, you can use the same paper or a complementary color to cut a small circle out of the wrapping paper and attach it to the edge’s center to cover the dirt.
Pinch the folded end to the other end and secure the seam with invisible tape. And when done, seal with tape and wrap around wrapping paper to cover the mess
Fifth Step
Push the paper towards the top of the roll and crumple it. Secure the edges with a small invisible tape. Continue to fold each other about 1 inch around the top of the cylinder. Repeat this step at the bottom of the cylinder.
Sixth Step
Cut a small circle from the wrapping paper and glue it to close the cylinder’s upper central part. You can also cover the top with a bow.
Finish with a bow and/or ribbon. Place the cylindrical gift and center it on the long ribbon. Pull the ribbon to the side of the gift and tie a knot in the center of the gift’s top. Cut the tape so that it has two long ends on each side of the tape. Then add a bow in the center of the gift at the top of the bow. If you desire, you can wrap the ribbon and place it on the side of the gift.
In addition, placing a bow on the gift without adding a ribbon simplifies the look.
Choose a bow and ribbon that match the color of the wrapping paper. For example, if you are using red paper with a gold star, you can use a gold ribbon and a bow. Finally, glue a piece of tape or wrapping paper around the center of the cylinder.
How to wrap a cylinder gift using both ends twisting
Step One
Measure and cut the paper. If you use the twist method to wrap the gift box, you will need more wrapping paper. First, put the gift on the wrapping paper and make sure you have enough paper to wrap the gift.
Leave an extra 0.5 inch of paper to cover. On both sides of the gift, pull the paper out on both sides, making sure it completely covers the gift. Measuring skills is not always perfect. But you actually have to make sure every page is uniform. Lastly, It is best to have extra paper since you can cut it later if you want.
Step Two
Wrap the paper around the rollers. Place the gift in the center of the paper with the front of the wrapping paper facing down. Make a small 1/4 inch fold in one of the long edges of the paper. Similarly, take a strip of double-sided tape and put it along the fold. Then wrap the paper in a roll and tape it off. Please make sure the gift is in the center of the tube, then slide it with your finger to match it.
Step Three
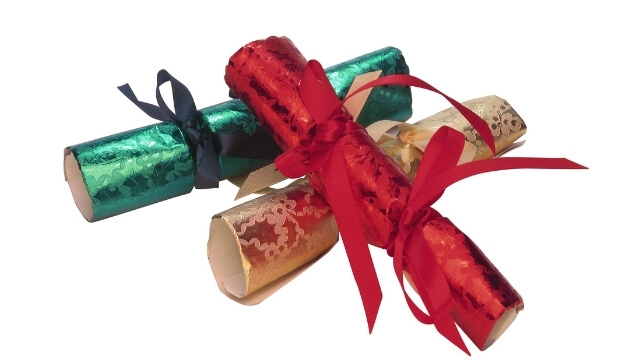
Twist the paper on both ends. Bring any excess paper to one end of the tube and gently twist it. For more precise adjustments, you can create individual prompts at once. Wrap the tape around the twisted part of the wrapping paper and hold it in place. Finally, remove the excess paper and give the gift the look of a candy wrapper.
This method is ideal for cylindrical gifts that do not need to be standing, as the gifts must be stacked horizontally.
Step Four
Tie both ends with a ribbon. To enhance the decoration and modification effect, you can tie the ribbon on both ends of the wrapping paper to the roll-up part. Tie the ribbon and loosen the excess ribbon. Also, combine ribbon and wrapping paper. Add tags or gift cards if necessary.
How to wrap a cylinder gift using a gift bag
Step One
Cover the gift with tissue paper. It’s hidden in a gift bag, so you don’t have to spend a lot of time. Basically, you just want to cover the gift with a handkerchief so that no one can see it when you look inside the bag.
Step Two
Choose a gift bag that will fit your gift. If you want to wrap something fragile, place a few tissue paper sheets on the bottom of the gift bag to cushion it even more. Use a gift bag that matches the size of your gift. For example, you need to put the whole gift in a bag.
Step Three
Put the gift in the bag. Depending on the present, the cylinder can be placed vertically or along the bottom of the bag. For example, if the gift is a bottle of homemade sauce, you can put it in the bag vertically to prevent overflow.
Or, if you want to wrap it in a cylindrical wrapping cloth, you can place it horizontally on the bottom of the bag.
Step Four
Add a decorative paper towel. Just take a thin piece of paper and place it in the middle. Hold the paper and wipe your wrist and smooth it with your other hand. Turn the tissue paper over and place it in the bag with the bulging side up. The tissue paper’s compressed edge should be inside the container, and the fuzzy edge should be on top.
Repeat for 3-4 sheets of thin paper.
Choose a paper towel that matches the color of your bag. You can actually use one or more colors of thin paper.
Conclusion
Gift wrapping will be fun until you come across an awkward shape that is difficult to wrap. For example, a cookie jar or a jar of your choice may be a nightmare, but it doesn’t look very beautiful under the tree if it doesn’t achieve the desired effect.
But fear not. With the help of this guide and our gift-wrapping specialists, this is a professional way to pack a cylinder without all the chaotic edges.
Similarly, squares and rectangles are easy to pack, but many people don’t know how to handle the edges when packing cylinders.
Wrapping and tying the edges like fireworks is one solution, but with a little patience, you can better wrap the cylindrical gift like a pro.
The basics include measuring and cutting the paper. And by wrapping a cylindrical gift, you can easily calculate the amount of paper by using it as a guide.
Place the gift on the wrapping paper, allowing the piece actually to wrap around the entire cylinder. Cut the paper so that it overlaps about 1/2 inch. Pull the paper on both sides of the gift. Finally, just wrap it up and tie it off.
If these directions above are a bit complicated, there are literary hundreds of follow-up and directional videos that you can find online videos, especially on YouTube.